How to record 360° videos
Gather everything you’ve ever learned about video cameras, put it in a box and close the lid. We’re talking about a complete revolution. It’s a bit like when we went from the physical keyboard to a touchscreen, or from film cameras to digital. In the beginning, you try going through the motions you already know from the older device, but ultimately, you end up getting used to the new one. To begin with, you should get into the habit of cleaning the lens each time before you start shooting: it gets dirty easily given the surface area it takes up.
How to control what gets recorded
First of all, these devices don’t come with a screen or a display that shows you what’s being recorded. You’ll need to download the app that corresponds to the device and follow the installation instructions. Through the app, you can livestream the recording, remotely control the camera (play, stop, pause), take photos and tweak the usual settings you find for a camera (brightness, ISO, shutter speed, etc.).
Best camera apps for Android
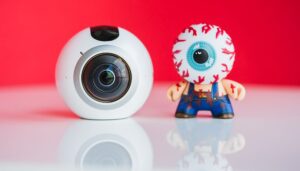
AndroidPIT gear 360 review 1526
There is no single point-of-view. / © NextPit
Point-of-view
The first thing I normally decide when I take a photo or a video, with the person who will watch the video later in mind, is which point-of-view is best. Well, just forget about that because in this case, a single point-of-view doesn’t exist. Differing from traditional video cameras, the person watching the video can decide in which direction they want to look, not where the person who recorded the video wants them to. Basically, I record but you get to decide what you want to see. The freedom is exhilarating! This new dimension will also depend on whether the device is placed in a location that is unobstructed in all directions, so completely 360°.
I record but you get to decide what you want to see. So much freedom!
Positioning
I wanted to record the cafeteria where the AndroidPIT team eats lunch and it seemed logical to put the camera in the farthest corner to try and get the widest frame possible. Wrong! If you want to record an entire room, you need to place the device vertically in the center of the room (ideally not moving it around), positioned at equal distances from the objects you want to record (not doing this will result in the nausea-inducing videos like the one below). There are two reasons to adhere to these measures: first, the lenses will work better in all directions, and secondly, you’ll have a closer shot of the objects in the room seeing as a zoom function doesn’t exist. These measures are equally valid in other contexts, such as riding on a bike (stick it on the handle bar and not your helmet), in a car (the dashboard and not the steering wheel), or taking in a view of a city skyline. It’s important that even when moving, the device stays upright and as steady as possible.
The protagonist
You can record absolutely anything: a herd of animals at the foot of a waterfall, landscapes you pass on your motorcycle, skyscrapers you can see from a terrace (including everyone on the terrace with you). Always remember though, you’re in the video as well. There are only a few blind spots (generally between the two lenses), which means you’ll almost always be in the shot. If you pick your nose while riding your bike, even though the camera’s on your helmet, viewers will see it. That being said, if you don’t want to be in the picture, you’ll have to hide in a spot where the eye of 360º Big Brother can’t see (under a car, in a different room or on the ceiling, to give you a few ideas.)
How to do 360 degree panoramic shooting
You already have all the necessary info to start shooting with a 360° camera. But before pushing the start button, keep one thing in mind: the initial point-of-view. There will always one screenshot the viewer will see before they start moving the captured image/video around (with a mouse, a VR headset, or moving it their finger). To make sure that this first shot isn’t of your jeans or a close-up of your lovely face, remember to point the lens towards whatever you want the initial screen to be. Changing it post-production is a hassle.
How to edit a 360 degree video
Keep in mind that any changes you make might not work with the geometry of the image: you can only insert text if it also has the same level of distortion as the picture and, as mentioned above, you can’t zoom. You can, however, play with the color, contrast, brightness, and a few other settings. Making these changes can be done using simple tools like Adobe Premier or Movie Maker.
Our list of the best video editing apps for Android
Edit a 360° video via PC
I thought that if I took out the memory card and put it into my PC (or via the internal storage of the device), I’d immediately be able to see the videos taken from both lenses combined into one 360 degree recording. But what I actually found were two independent videos that reminded me of those old-world maps (the same ones you see when you go into the app to control what you’re recording). Do you remember those world maps that had two circles, which seemed completely separate from each other, but when put together showed the world? Well, it’s basically the same thing.
360video
Post-production work on your PC takes a bit longer. / © NextPit
My colleague Stefan informed me that I needed to “stitch” the two worlds together to see the whole image on a single plane. In more technical terms, by coupling the two images, you get a round, equidistant or polarized projection. Generally, the software used to stitch the videos together comes with the camera itself or, if it doesn’t, you can use third-party tools like Mettle.
Edit a 360° video via smartphone
Through the app, you can send the video to your smartphone (remember that it will always be stored on your 360º camera, even when the app is activated during filming). In this case, the app itself will do the work of stitching, so you don’t have to do any extra work.
Check out the best photo editing apps for Android
How to share a 360º video
If you want to share your video on YouTube, Periscope or on your Facebook wall, the process is different if you performed the action on your PC or smartphone. On your PC, you’ll need to add metadata to the file in question, seeing as YouTube doesn’t actually recognize the recording as a 360º video. Head to this YouTube page for a complete guide on how to upload 360º videos. You shouldn’t have any problems on your smartphone as the phone automatically recognizes the video.
Conclusion
I admit that, at first, I was pretty confused. I didn’t know how to hold the camera, what I had to do, and the idea of not having an integrated screen on the device was slightly unsettling. But I can assure you that you’ll pick it up in no time. The editing tools also proved to be intuitive and quick.
In conclusion, and without a doubt, using these cameras requires a bit more effort than recording a simple video on your phone, but the final result is way better! For anyone who loves travelling, adventures, incredible landscapes or simply if you who want an unlimited point of view, I recommend that you try this out, at least once.
Source: https://www.nextpit.com/360-degree-camera-what-you-need-to-know
- https://www.nextpit.com/
- Camera
- United States